Electric Violin Build Part 3
During the initial draft, I planned to incorporate an on-board active pickup for the piezo of the violin. But after carving out the compartments, only did I realize the space leftover was not big enough to contain the electronics. So I had no choice but to leave the compartments as is, and connect the bridge pickup to the output jack directly. I shall try to plug the output into the original planned pickup circuit, which is the popular Don Tillman's preamp, and hope that gives me a signal.
Carving compartments for electronics
I decided to carve out three cavities from the main body, for the 9V battery holder, a smaller cavity for the preamp circuit, and one more to fit the output jack. I forgot to take pictures while working on them, but here's a picture of it when done.
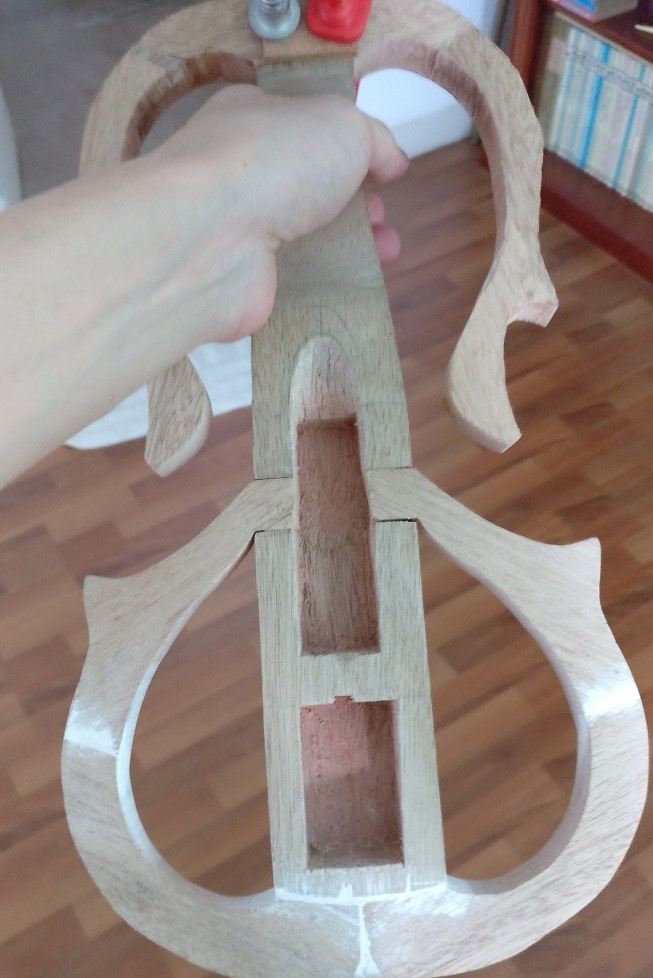
I decided to merge the audio jack's cavity with the one supposedly for the electronic circuit. I also started to fill the gaps between the joints using wood filler, as can be seen in the picture. I couldn't find a way to make the "floor" of the holes to be smooth, despite running the chisel over them multiple times. They were too small to sand nor file properly too, so I got lazy and decided to left them as is as they won't be visible anyway.
The saddle
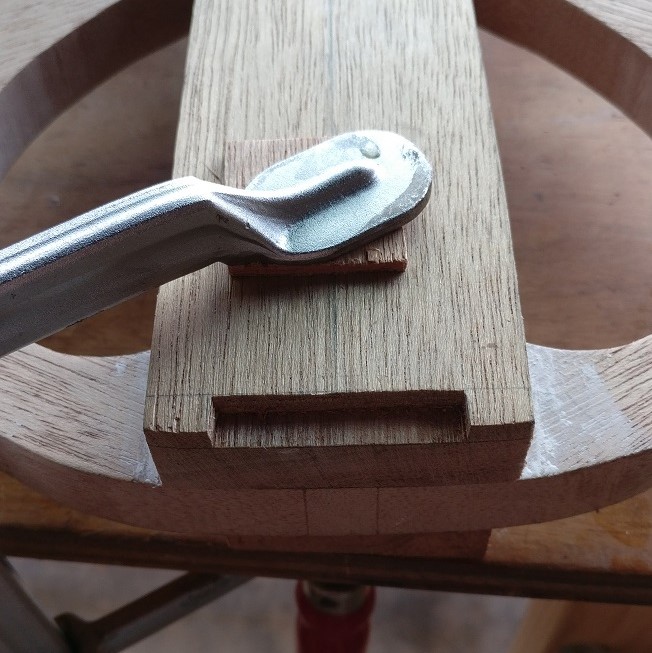
One note about the saddle here. It doesn't really deserves its own section (I don't even have a closeup picture of the saddle), but I felt that this was the best chisel work I did throughout this project. Please, marvel at my workmanship on the saddle's mortice!
Gluing the fingerboard
Now that everything is in place, it's time to glue the fingerboard. Right before I was about to glue it on, I realized there was a spot under the end of the fingerboard which would be hard to paint once I glued it on. So I decided to do the first round of painting on that spot prior to gluing.

In the image, there is a block of wood where the bridge is supposed to be. This was due to the incorrect fingerboard angle due to the mistake I made when cutting the angled piece at the beginning. The incorrect angle caused the bridge to be way lower than intended when compared to my acoustic violin, so I added that block as a shim for the bridge. After this, it was finally time to glue on the fingerboard.
Finishing touches and painting
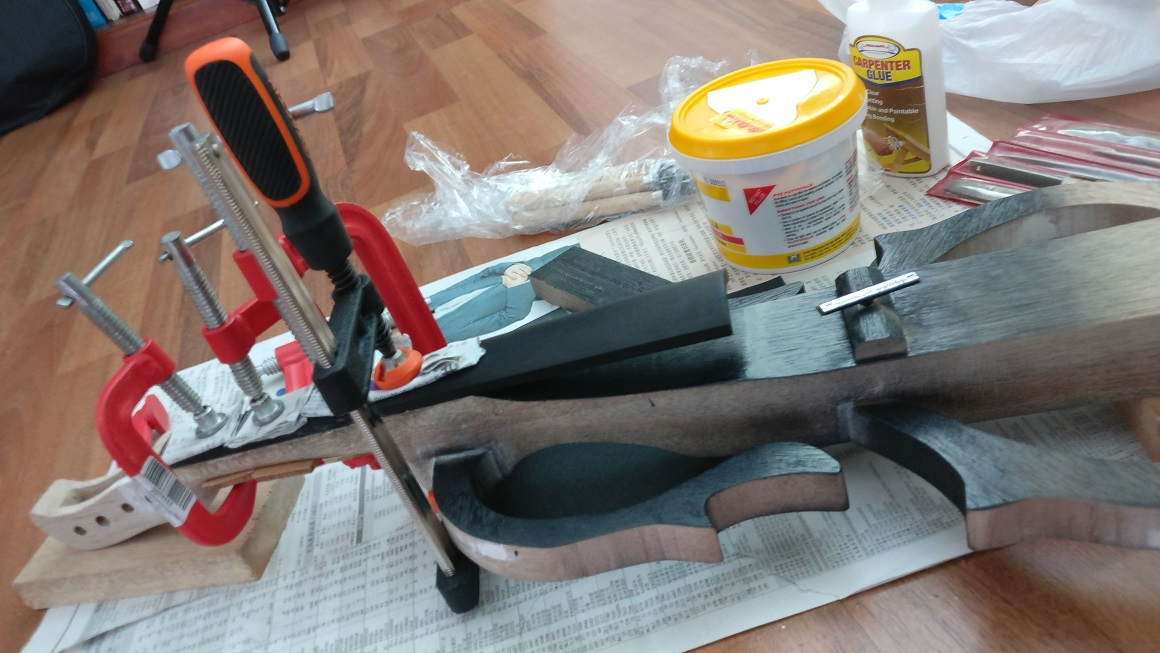
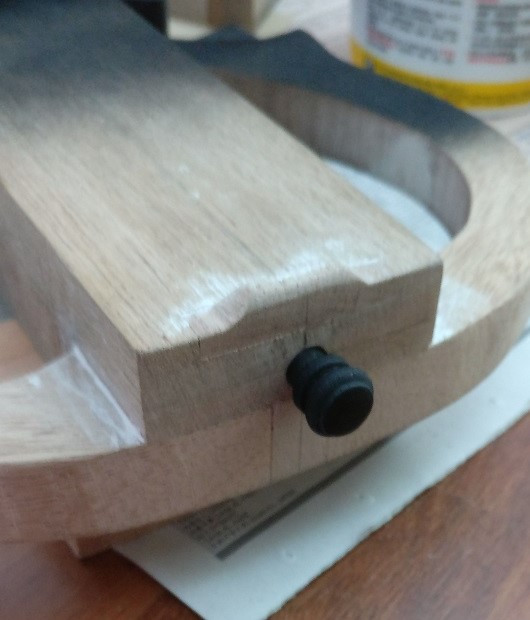
With the fingerboard glued in place, I drilled a hole for the endpin. At this point my membership for the woodworking workshop has ended, so I had to use the hand drill I had at home to drill it. Turns out I needed a 7.5mm diameter drill bit, which I did not have and I had to buy one before I could proceed.
Finally, the time for the paint job. I only had one experience of spray painting wood in high school, which did not turn out well as I remember. But nevertheless, I had to paint this violin as I used too much wood filler to cover up my mistakes, which looked terrible. I decided to spray paint the violin with black paint.

Turns out spray painting wood directly from a spray can was not such a good idea. The paint failed to cover imperfections on the wood, and the grain were raised and became rather prominent. I should give it a layer of paint primer before applying any paint in the future. But still, I like it for what it is!

Final accessories
There were still work to do before the violin can be stringed and played. Firstly, I needed a bridge for it. I bought bridge blanks online, and followed instructions to set it for my violin. Turns out, my shim was too high! So the completed bridge for my violin is rather short. Luckily it could still be adjusted for the correct string height.

I used my knife to carve the shape of the bridge according to the provided template in the violin making guide after marking the correct string height from the fingerboard. I then filed the edges smooth, before shaping the front (fingerboard facing side) of the bridge to be slightly rounded using a file. The top edge of the bridge was filed to be around 1.2mm thick. I also bought a chinrest online, which I drilled holes to fit the screws accordingly to attach to the body.
I had an old tailpiece lying around, with a tailgut made from wire of some sort. I also bought a new tailpiece with built-in fine tuners. Now when attaching the tailpiece, I decided that I liked the older one more, so I had to remove the old tailgut and replace it with the one from the newer tailpiece. After retrieving wire cutters to cut the old tailgut, I took one of them off the table and went ahead to cut it directly, only to realize that I had cut into the newer tailgut!
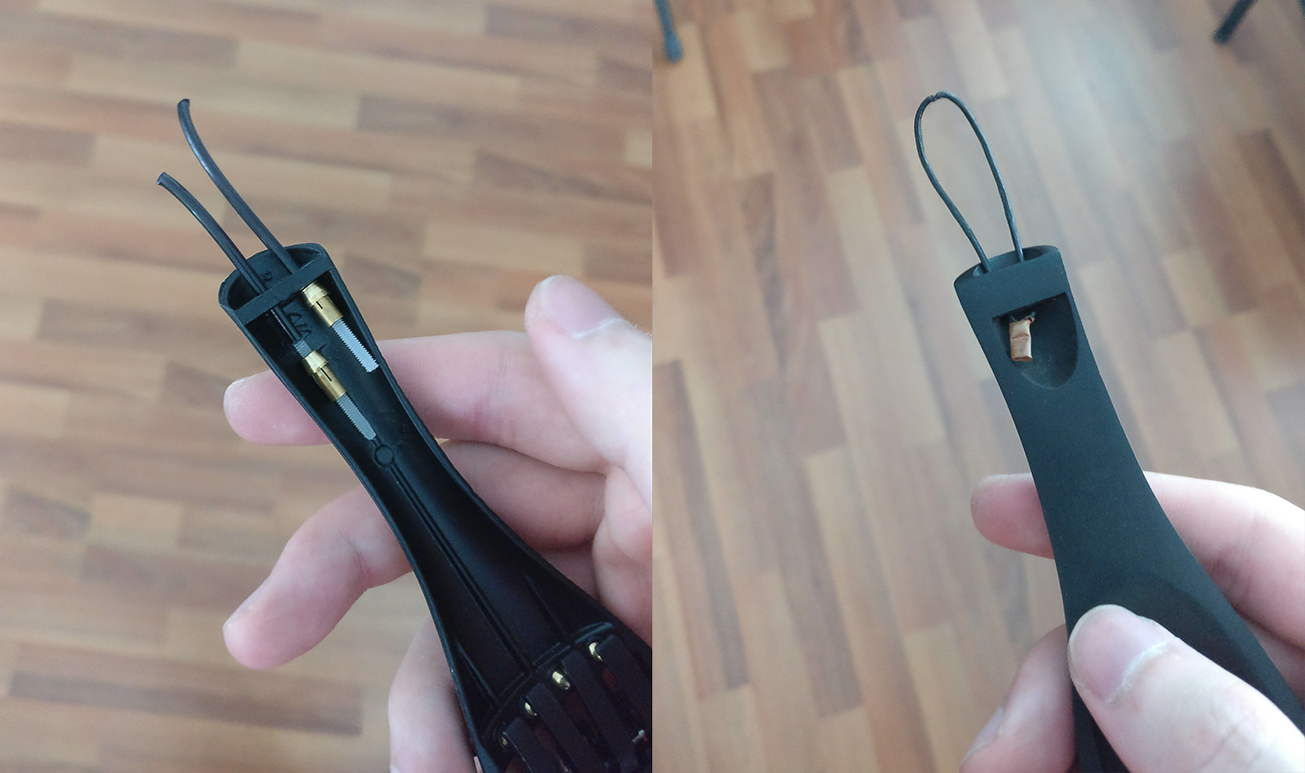
There was nothing else I could do as I don't have extras or any suitable replacements for a tailgut, except to purchase a new one online. So the project was unexpectedly stalled at the point of near completion.
Two weeks later...
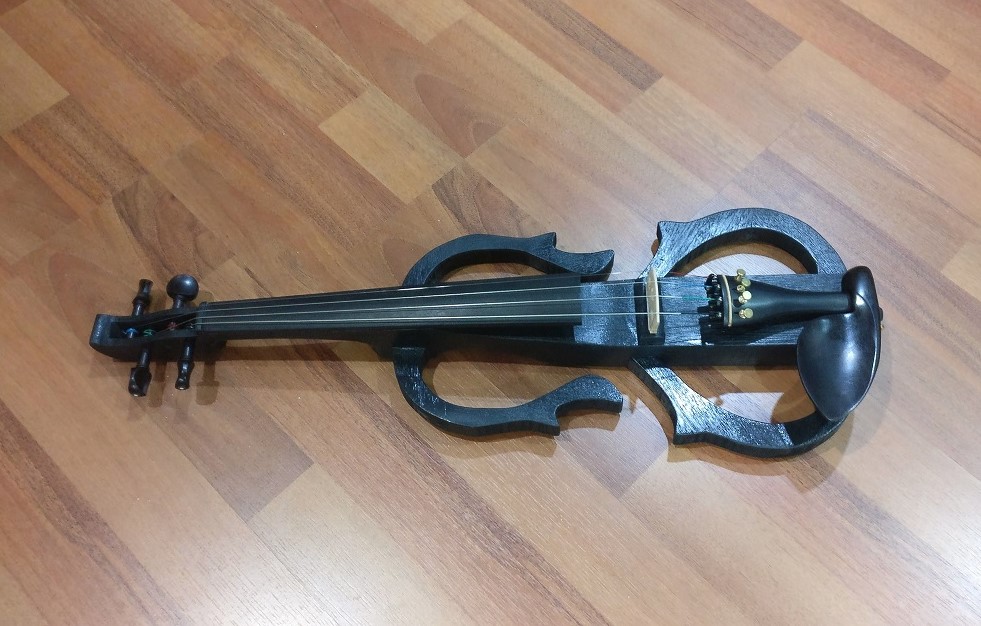
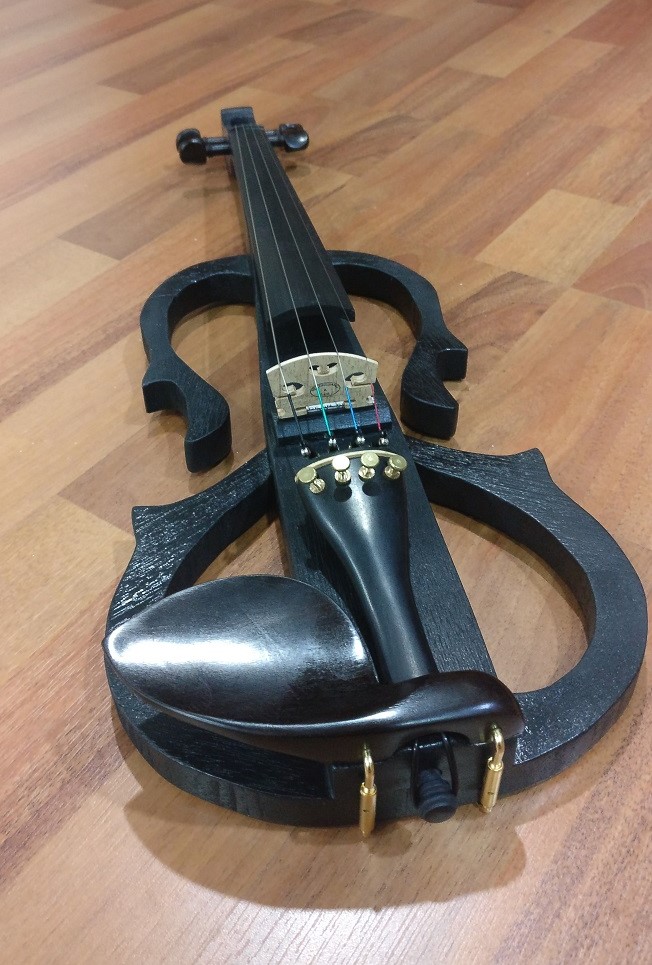
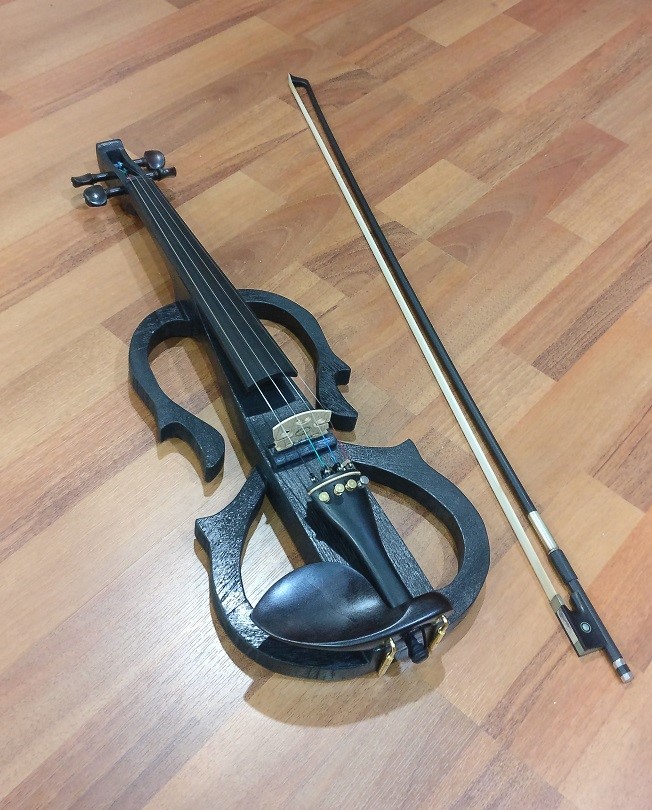
Well the replacement tailguts (yes I bought extra) have arrived, so now I can finally finish assembling my violin! Here it is!
Conclusion and final words
I have still yet to hook it up to an amplifier to test if the pickup actually worked, but it produces a rather muted tone when I play it. I did not shape the neck correctly, so now the neck is rather blocky and gets in the way of playing to some extent, but it is still playable. It is also rather heavy compared to my acoustic violin, so I aim to make enhancements to the weight if I make a second one, which I probably will!.
I feel that the upper half of the body outline serves no actual purpose other than cosmetic reasons (at least for me), which I guess I will remove in the next build as well.
It has been one hell of an experience making this violin. Overall, this project took about three months from the first day of purchasing wood to the day of stringing it up, as I only had time to work on it during weekends. It costed about half the price of the cheapest electric violin I could find, and what made it better was that it was made completely by myself (except the accessories \cough**)!
Anyway, that would be all for this build log. If I ever make another one, I will post another build log of it as well. Thanks for reading!